Fitting a Header Tank
By Danny Stroud
I decided to fit a header tank to my stag because I found that coolant water would expand into my expansion bottle when the engine was hot but it would not sook out again when the engine cooled down. I must have air entering the system somewhere, I have checked all the jubilee clips and unions for security and I do not appear to have a leak. It was for this reason and piece of mind that I felt that this was the way forward
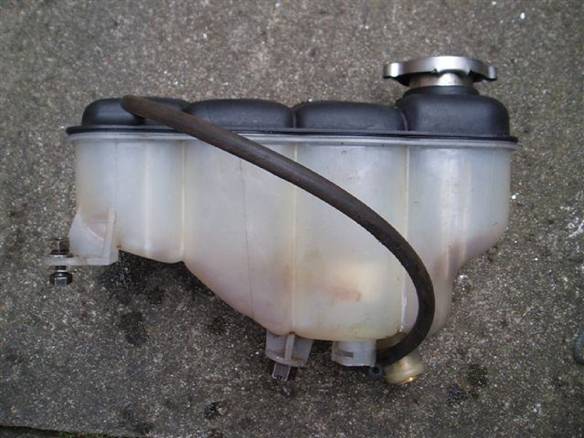
After studying loads of information on retro fit header tanks on Stags I decided to go for a header tank from a Mercedes C230 (W202) for a couple of reasons,
• It has an old style radiator cap and is more of a period fitting
• The level of coolant can be seen through the plastic
&
• It was 99p on eBay, I guess this should be the main reason.
The next stage was to decide on the best place to fit the tank, I chose the nearside turret, and brackets were made to suspend the tank from three places
• Inside stud on McPherson strut
• Forward wiper motor securing mount.
• From underside of tank to bottom of McPherson strut turret just above chassis.
No drilling of the car body work was required.
Tank in trial fitted position on the nearside turret .
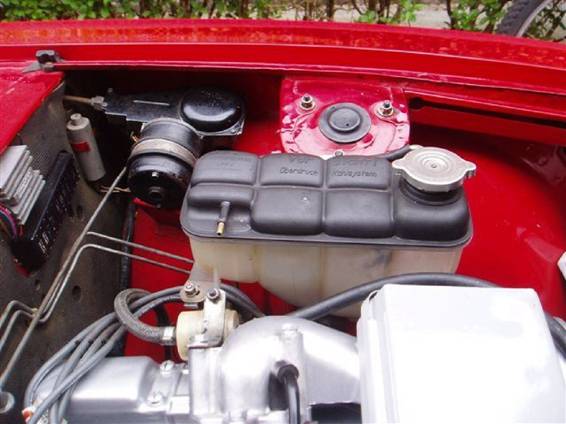
Ensure the tank is not fitted too high so as to foul the bonnet.
The top of the pressure cap just touches the bonnet felt in my setup
Showing height of tank
The overflow hose had to be extended as it terminated just above the brake PDWA valve and switch.
For the plumbing of the tank I ordered a variety of parts from CBS (Car Builders Solutions)
These included hoses, T and joining pieces and hose a reducer.
Some of the parts required
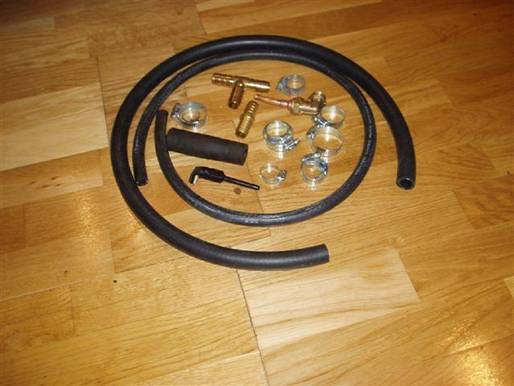
The small hose joining section 19mm to 15mm shown above did not fit the tank so I ended up raking around the Persley scrap yard until I found the perfect hose, It came from a Fiesta MK3 (I think), it has the correct 22mm diameter end for fitting the tank on one end and 15mm at the other end for fitting to the T piece which connects to the pump and the heater steel tube. It also has the correct bend (perfect in fact).
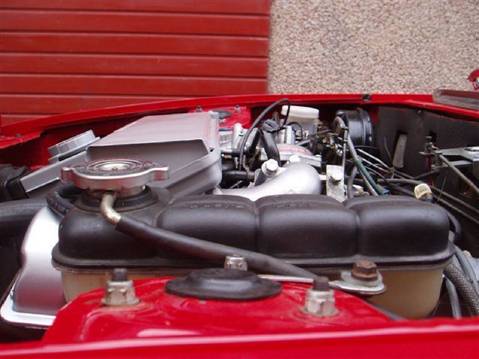
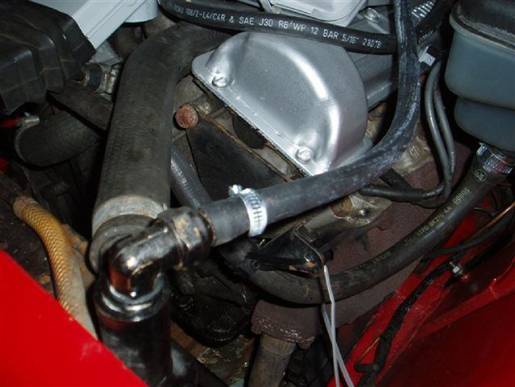
The setup at the front of the vee
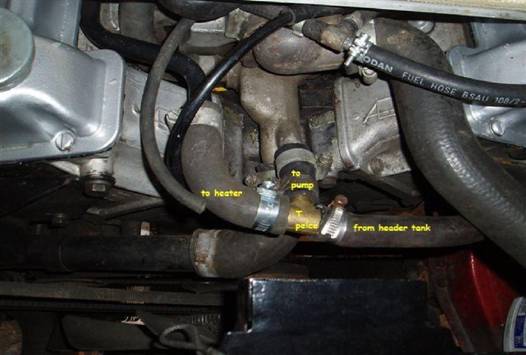
The Fiesta hose runs from the header tank to the T piece a short section of pipe runs to the pump and the other end of the T connects to the original U shaped hose which has been cut in half and remains connected to the steel heater pipe
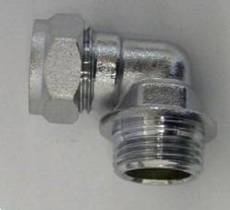
Remove the brass filling cap from the top of the radiator and fit the plumbing fitting to the threaded hole it is ½ BSP.
The vent/expansion hose from the top of the radiator was taken to the tank connection via the plumbing (½ to 15mm) connection. To this connection I fitted a 15mm to 8mm reducer with an 8mm pipe with a flared end soldered into its end an 8mm hose completed the connection.
Plumbing connection ½ to 15mm I fitted a brass one.
The other end of the 8mm vent/expansion hose connects to the 8mm connection at the top of the tank, this remains above the level of the coolant in the tank.
The final thing to do is to remove the overflow pipe from the right side of the radiator to the old expansion bottle. Once the pipe has been removed solder a plug/cover over the hole into the radiator.
Or you can do as I did and just plug the hose to the expansion bottle, doing it this way and you have the option of putting to back to original for a concours judging event!
Showing final arrangement with all brackets painted black.

The original stainless steel Mercedes cap is rated the same as the Triumph Stag pressure cap and it also looks good.
Access to the spark plugs, leads, brake PDWA valve and switch, wiper motor and fuse box are all still possible with ease.
AMENDMENT
Here is an a amendment to my STAG Header Tank upgrade. For a while now I have been
unhappy with the radiator top plumbing connection as this is damaging the bonnet sound
insulating pad.
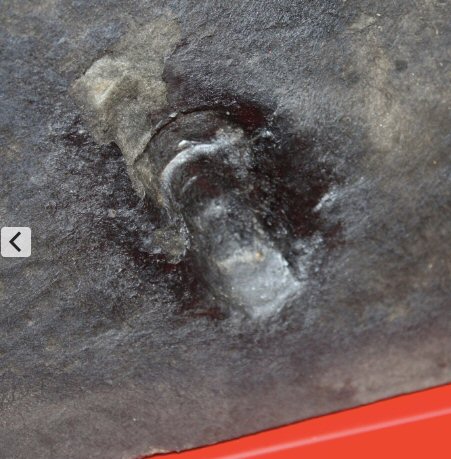
I decided to fit an offtake from the neck of the radiator top. The brass here is fairly thick but
I did decide to beef it up a bit by soldering a doubling plate to the outside of the neck just
below where the filler cap threads are.
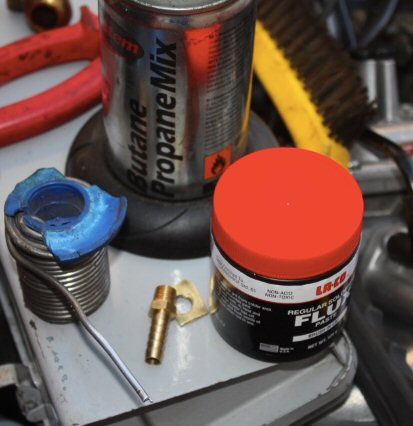
Equipment used
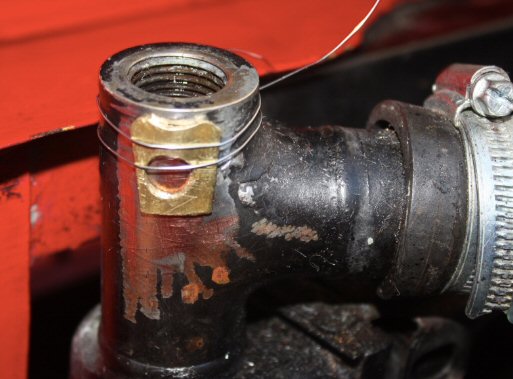
I drilled and tapped a hole into the neck of the radiator filler neck (prior to drilling and
taping a rag was pushed into the neck to stop any swarf entering the cooling system.

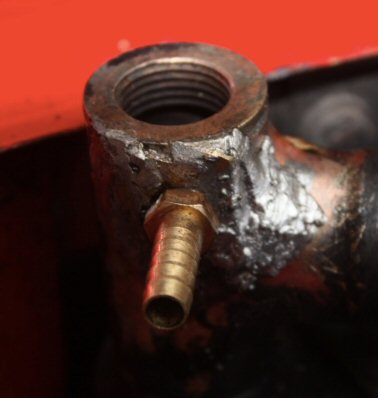
Showing the finished job.
If any further information is required please let me know dannystroud@sky.com
Also please have a look at the Grampian Triumph Clubs website. www.brmmbrmm.com/grampiantr.bb
April 2021